DIY Desk Organiser.
TAME your scattered office supplies with Zara’s easy DIY ideas for turning your home office into an organised command centre.
Your bedroom is where you sleep, your kitchen is where you eat, but your home office may be the nerve centre of your entire house.
If you own a home based business, this is where you keep your files, supplies and communicate with clients.
Even if you don’t work a 9 to 5 job out of your house office, it’s where you manage your household’s most important financial, medical and educational documents.
No matter what your office’s official use, you can’t get much done in there if it’s a cluttered mess and chances are you’re looking for a clever way to stay organised. Hopefully my DIY tips will help to get you started.
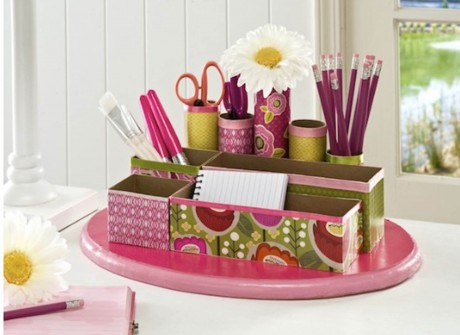
DESK ORGANISER
Supplies you will need:
Cereal boxes and toilet paper roll
Wood plaque – an old breadboard
Acrylic paint and paint brush – colour choice optional.
Colourful paper to cover your boxes and toilet paper roll – use old wallpaper or gift wrapping paper
Craft glue
Scissors, craft glue, ruler, tape and a pencil.
How to create:
1) Cut your cardboard into boxes, large and small sizes, tape the sides together in the meantime.
2) Trim the toilet paper rolls to create different heights to add interest.
3) Paint the wooden plaque/breadboard, choose colours that co- ordinate with the paper you’ve chose.
4) Cover the boxes and paper rolls using the paper you have chosen to decorate it with.
5) Lay your boxes and paper rolls out into a structure and layout that suits your organisational needs.
6) Glue each compartment down to your wooden plaque using craft glue and let it dry for 20 minutes.

DIY Clipboard Organiser.
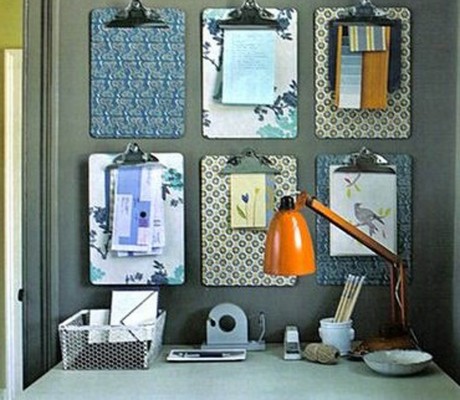
DIY CLIPBOARD ART
These clip boards on the wall are used to compose picture arrays to ones liking. These can be used for holding important little reminder notes and messages.
All you need to create this clipboard wall hanging are some clipboards, surprise, surprise…and you can choose how many you think will fit into your office spare.
Ideally hang these on the wall facing your desk so you can pin things directly to the board as you work. As well as being practical these can create a lovely aesthetic arrangement for your office space.

Tin Can Organiser.
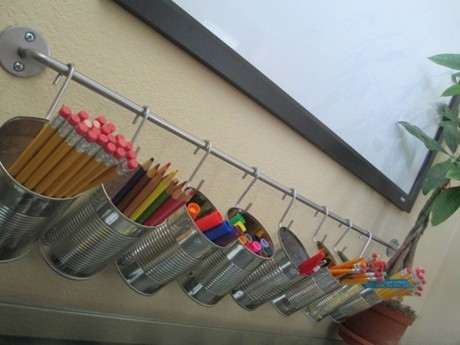
TIN CAN ORGANISER
I find this a very handy way of organising the hundreds of pens, pencils and office accessories I seem to gather. This bar could be hung right in front of your desk are so you can see everything you need laid out in front of you. Pick and choose what office accessories you want to organise into your tin cans to make the most of them.
Materials needed:
Tin cans
Towel bar and S hooks
Screwdriver
Hole puncher
Rubber hammer
How to create:
1) Use a rubber hammer to flatten out all rough metal edges on the inside of the can.
2) Using a hold puncher, punch one hole in each can
3) Screw towel bar to the wall.
4) Insect one end of the S hook into the hold of the can
5) Finally, hook the other end of the S hook to the towel bar.
TÁ an t-earrach buailte linn agus ciallaíonn sé sin go bhfuil a lán dao-ine ag samointiú ar fheabhsúcháin tí...


